如何在iPhone上部署AutoGLM
记录一下如何让AI接管iPhone手机
前言
智谱开源AutoGLM之后,人人都能打造自己的“豆包手机”了。
2025年,当安卓厂商的AI助手在帮用户写论文、P图、订机票、点2000杯咖啡时,苹果的Siri依然坚守初心,致力于为人类提供禅意体验:“嗯……这个问题……我好像不太明白呢。” 🤔
项目背景
Open-AutoGLM 是基于 AutoGLM-Phone-9B 视觉-语言模型的智能手机自动化框架。感谢Rocke1001feller作者成功将其从 Android (ADB) 适配到 iOS (WebDriverAgent)。
技术架构
|
|
环境准备
系统要求
- 操作系统: macOS 10.14+ (建议 macOS 12+)
- Xcode: 14.0+ (需要从 App Store 安装)
- iOS 设备: iOS 13.0+ (建议 iOS 14+)
- Python: 3.10+
- 网络: 稳定的互联网连接(用于 AI 模型 API)
安装必要工具
安装Homebrew、libimobiledevice
|
|
部署 WebDriverAgent
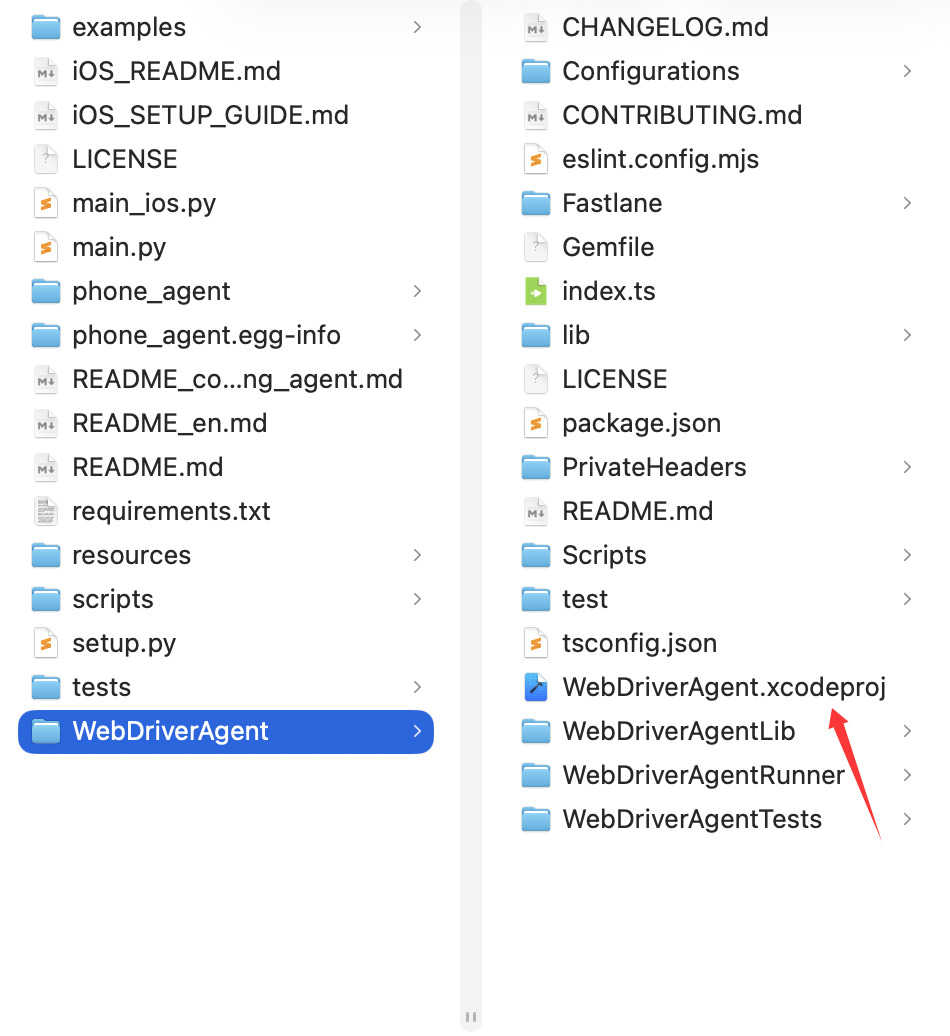
下载 WebDriverAgent
先下载智谱的Open-AutoGLM,这里直接下载有ios-phone分支的版本,接着下载WebDriverAgent项目。
|
|
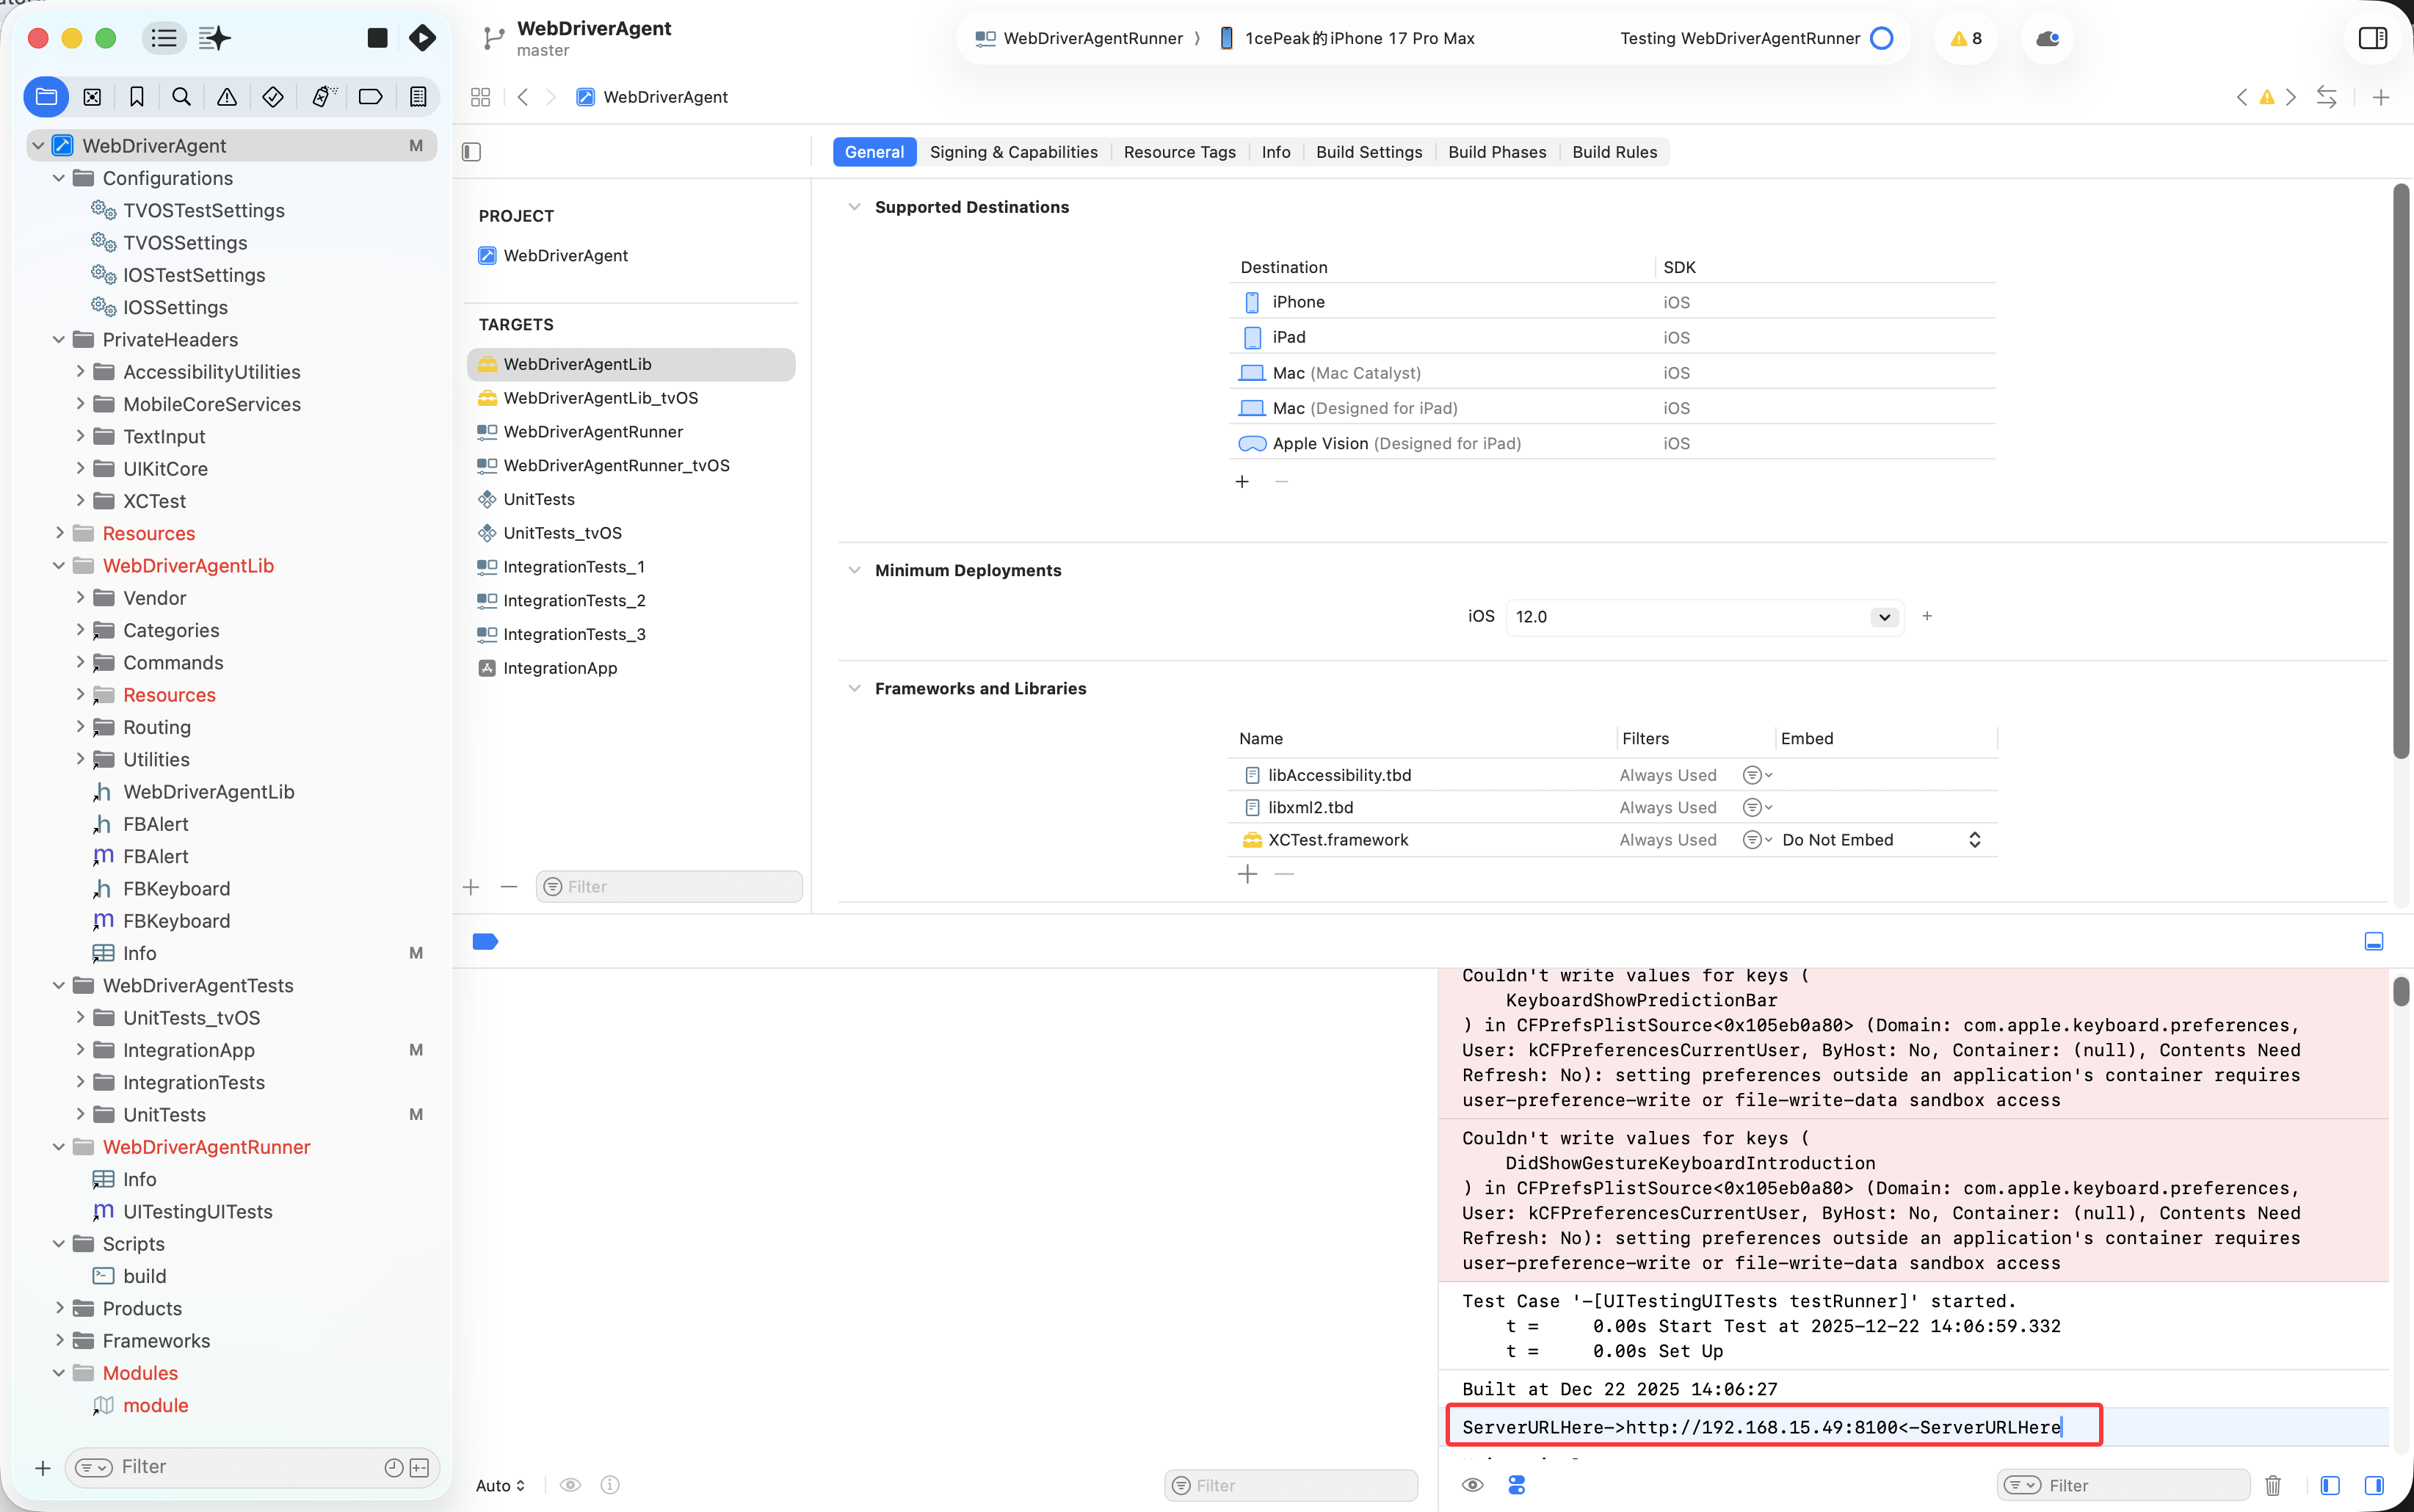
配置 Xcode 项目
打开项目
安装好Xcode之后,双击打开WebDriverAgent/WebDriverAgent.xcodeproj项目
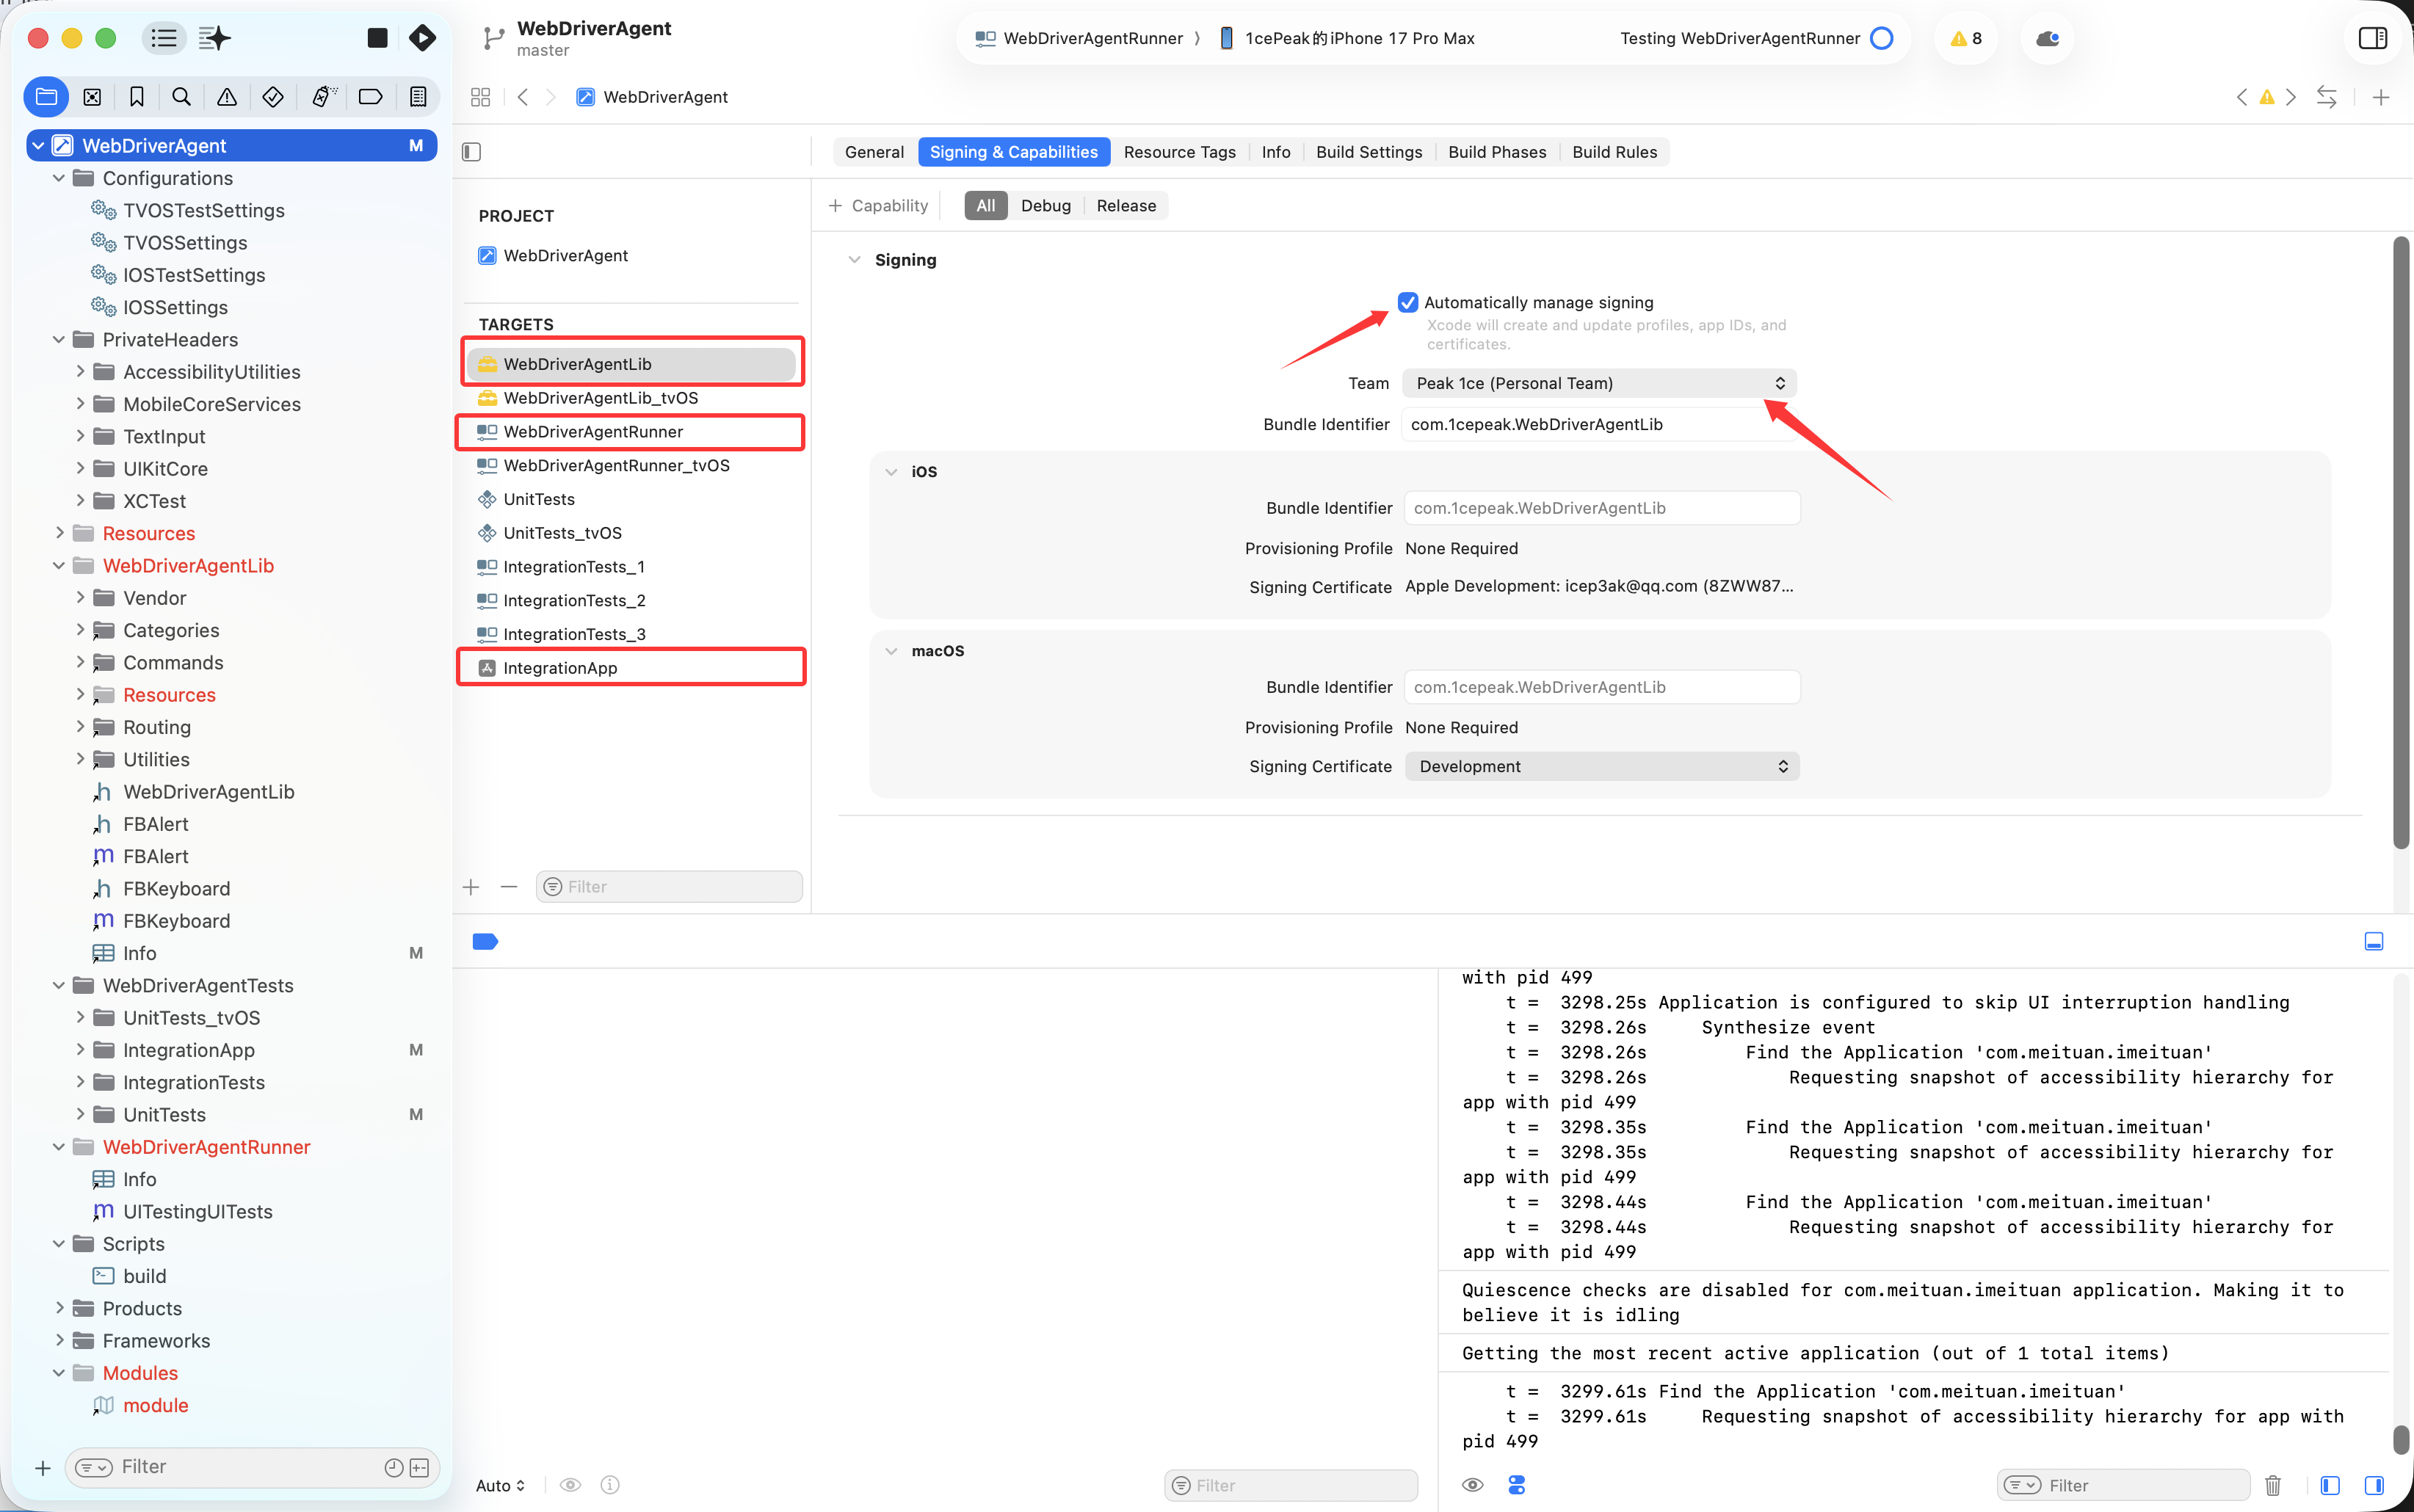
配置签名
- 在 Xcode 左侧项目导航器中,选择 WebDriverAgent 项目
- 选择 WebDriverAgentLib target
- 点击 Signing & Capabilities 标签
- 勾选 Automatically manage signing
- 选择你的 Team(需要 Apple Developer 账号,不需要付费!)
重要: 重复上述步骤为以下 targets 配置签名:
- WebDriverAgentLib
- WebDriverAgentRunner
- IntegrationApp
修改 Bundle ID(如果遇到冲突)
如果出现 “Failed to register bundle identifier” 错误:
- 选择 WebDriverAgentRunner target
- 修改 Bundle Identifier,例如:
|
|
在这里,yourname可以自定义,输入一个你喜欢的就好。
安装应用到设备
连接 iOS 设备
- 使用 USB 线连接 iPhone/iPad 到 Mac
- 在设备上信任此电脑
- 在 Xcode 顶部工具栏,选择你的真机设备(切记,不然之后会报错!)

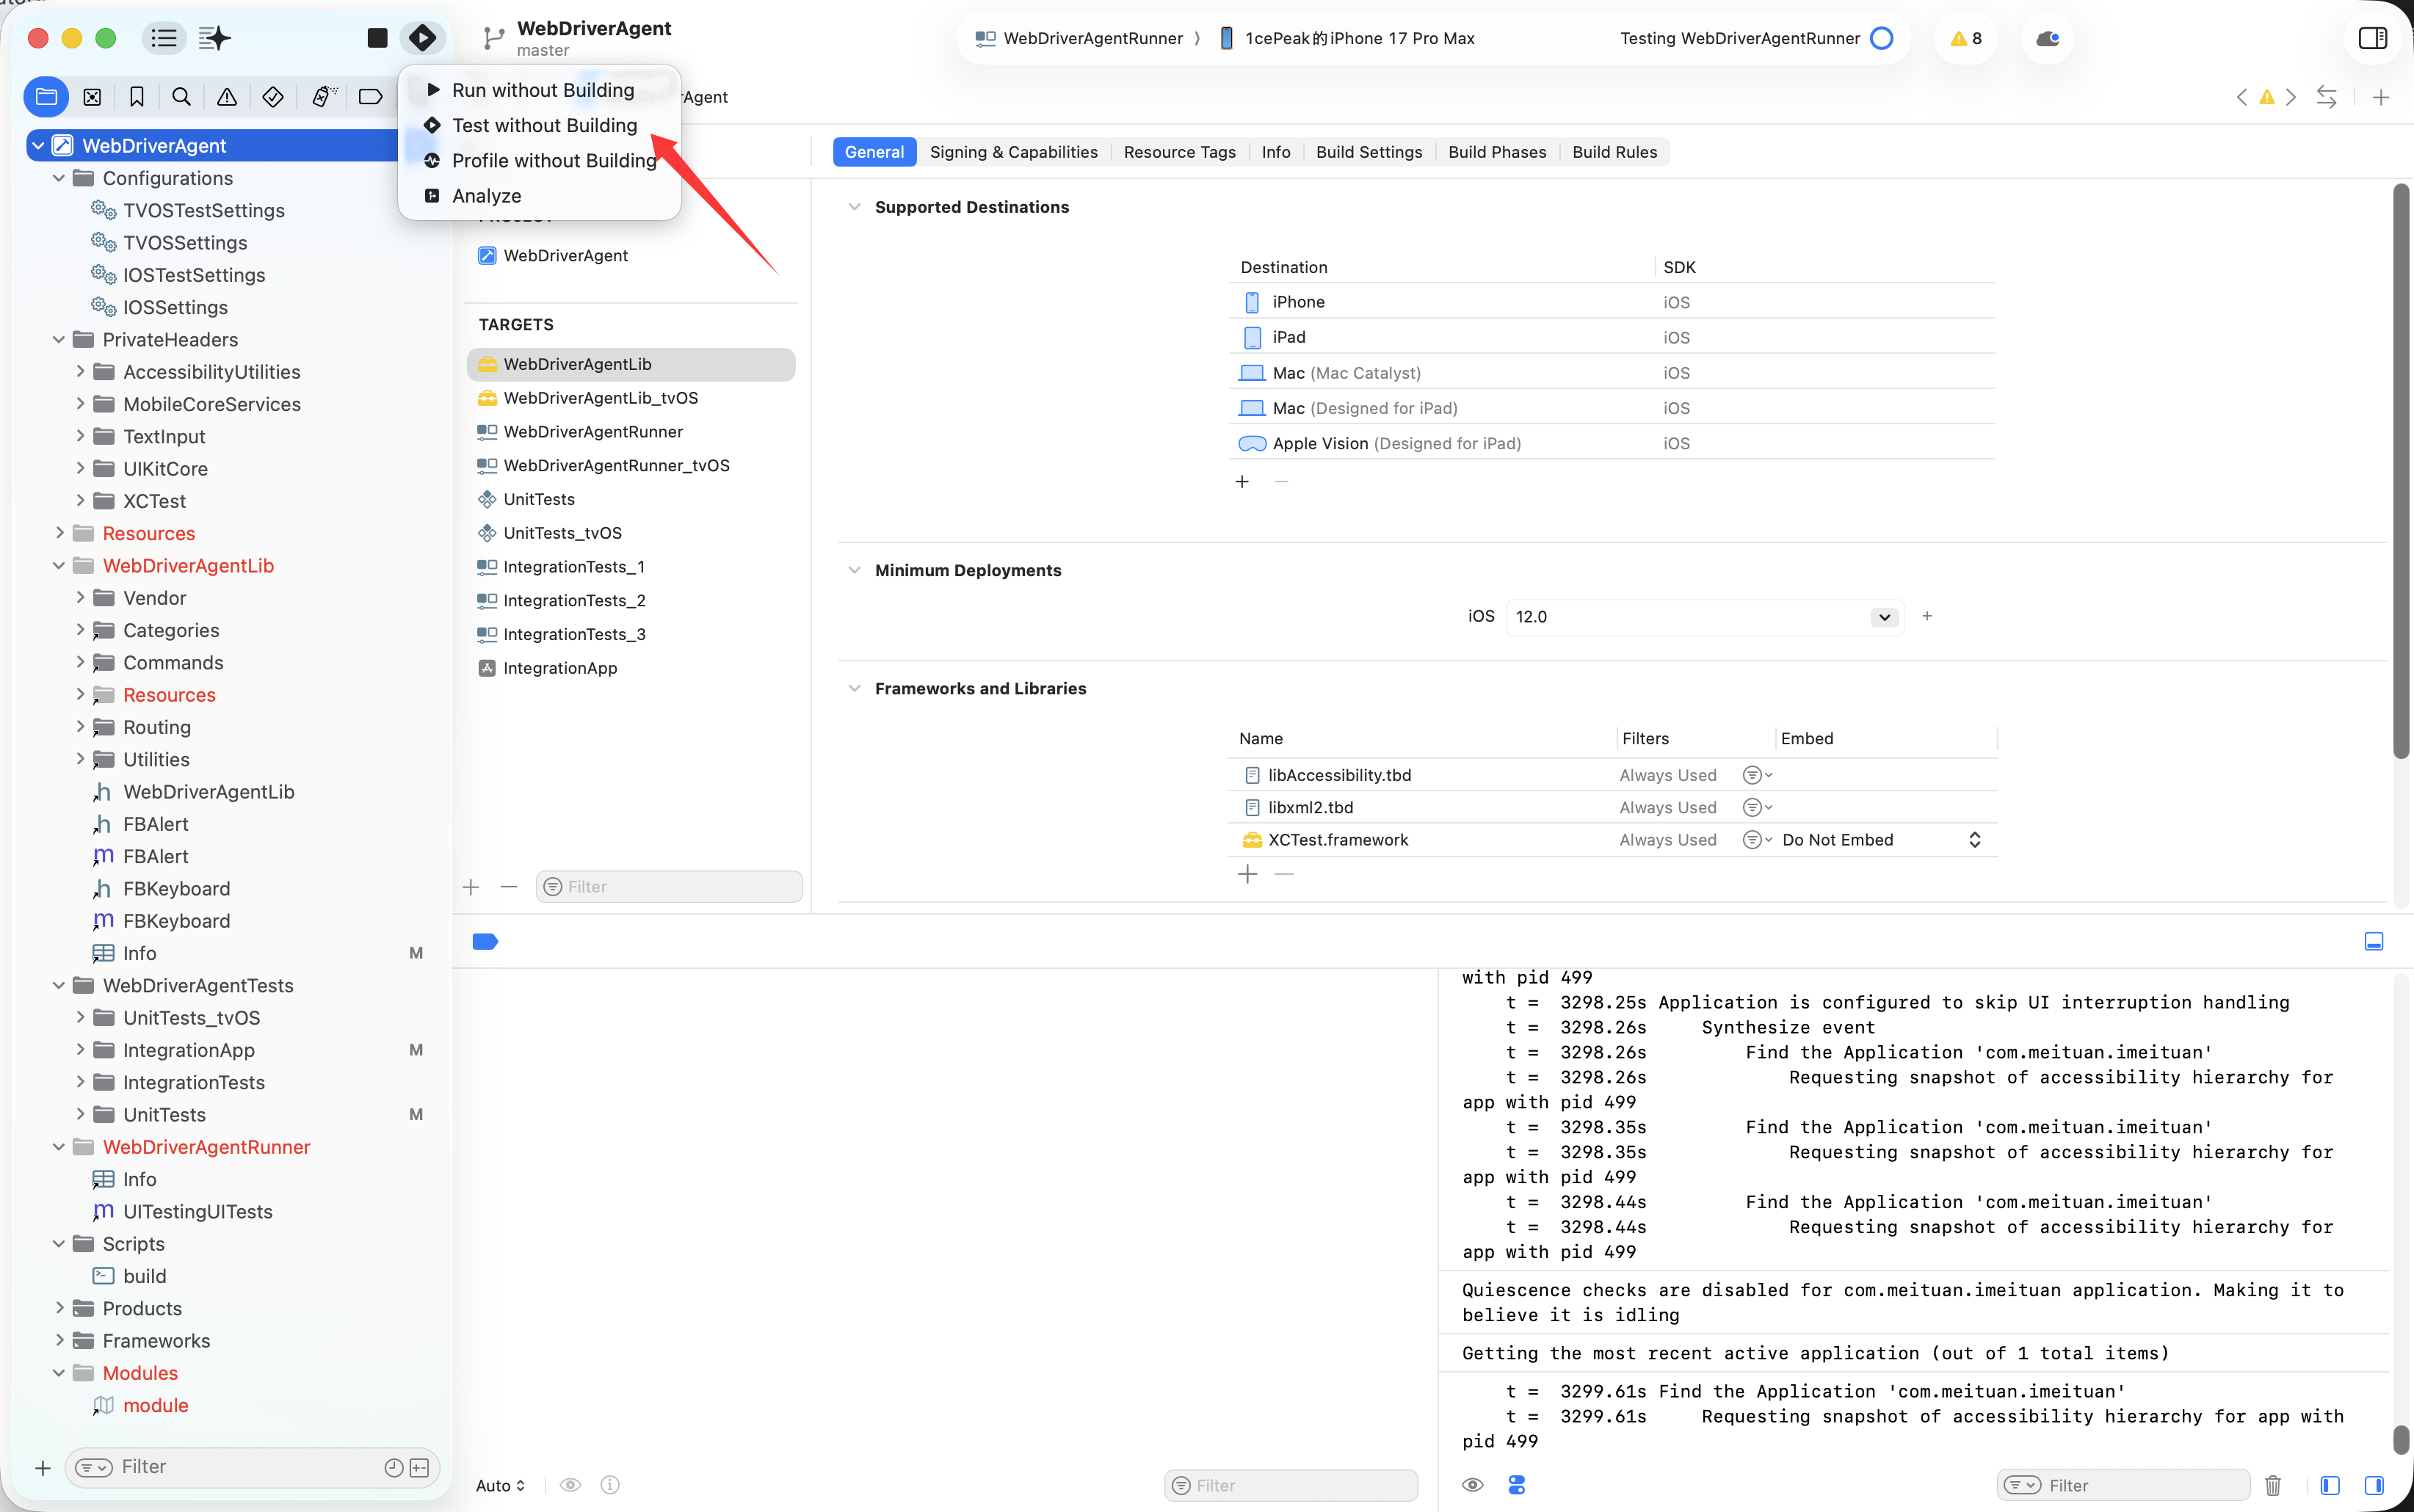
运行 WebDriverAgent
- 选择 Product → Scheme → WebDriverAgentRunner
- 按 ⌘+U 或点击 Product → Test,或者长按Xcode左上角的运行符号,会出现几个选项,选择Test即可
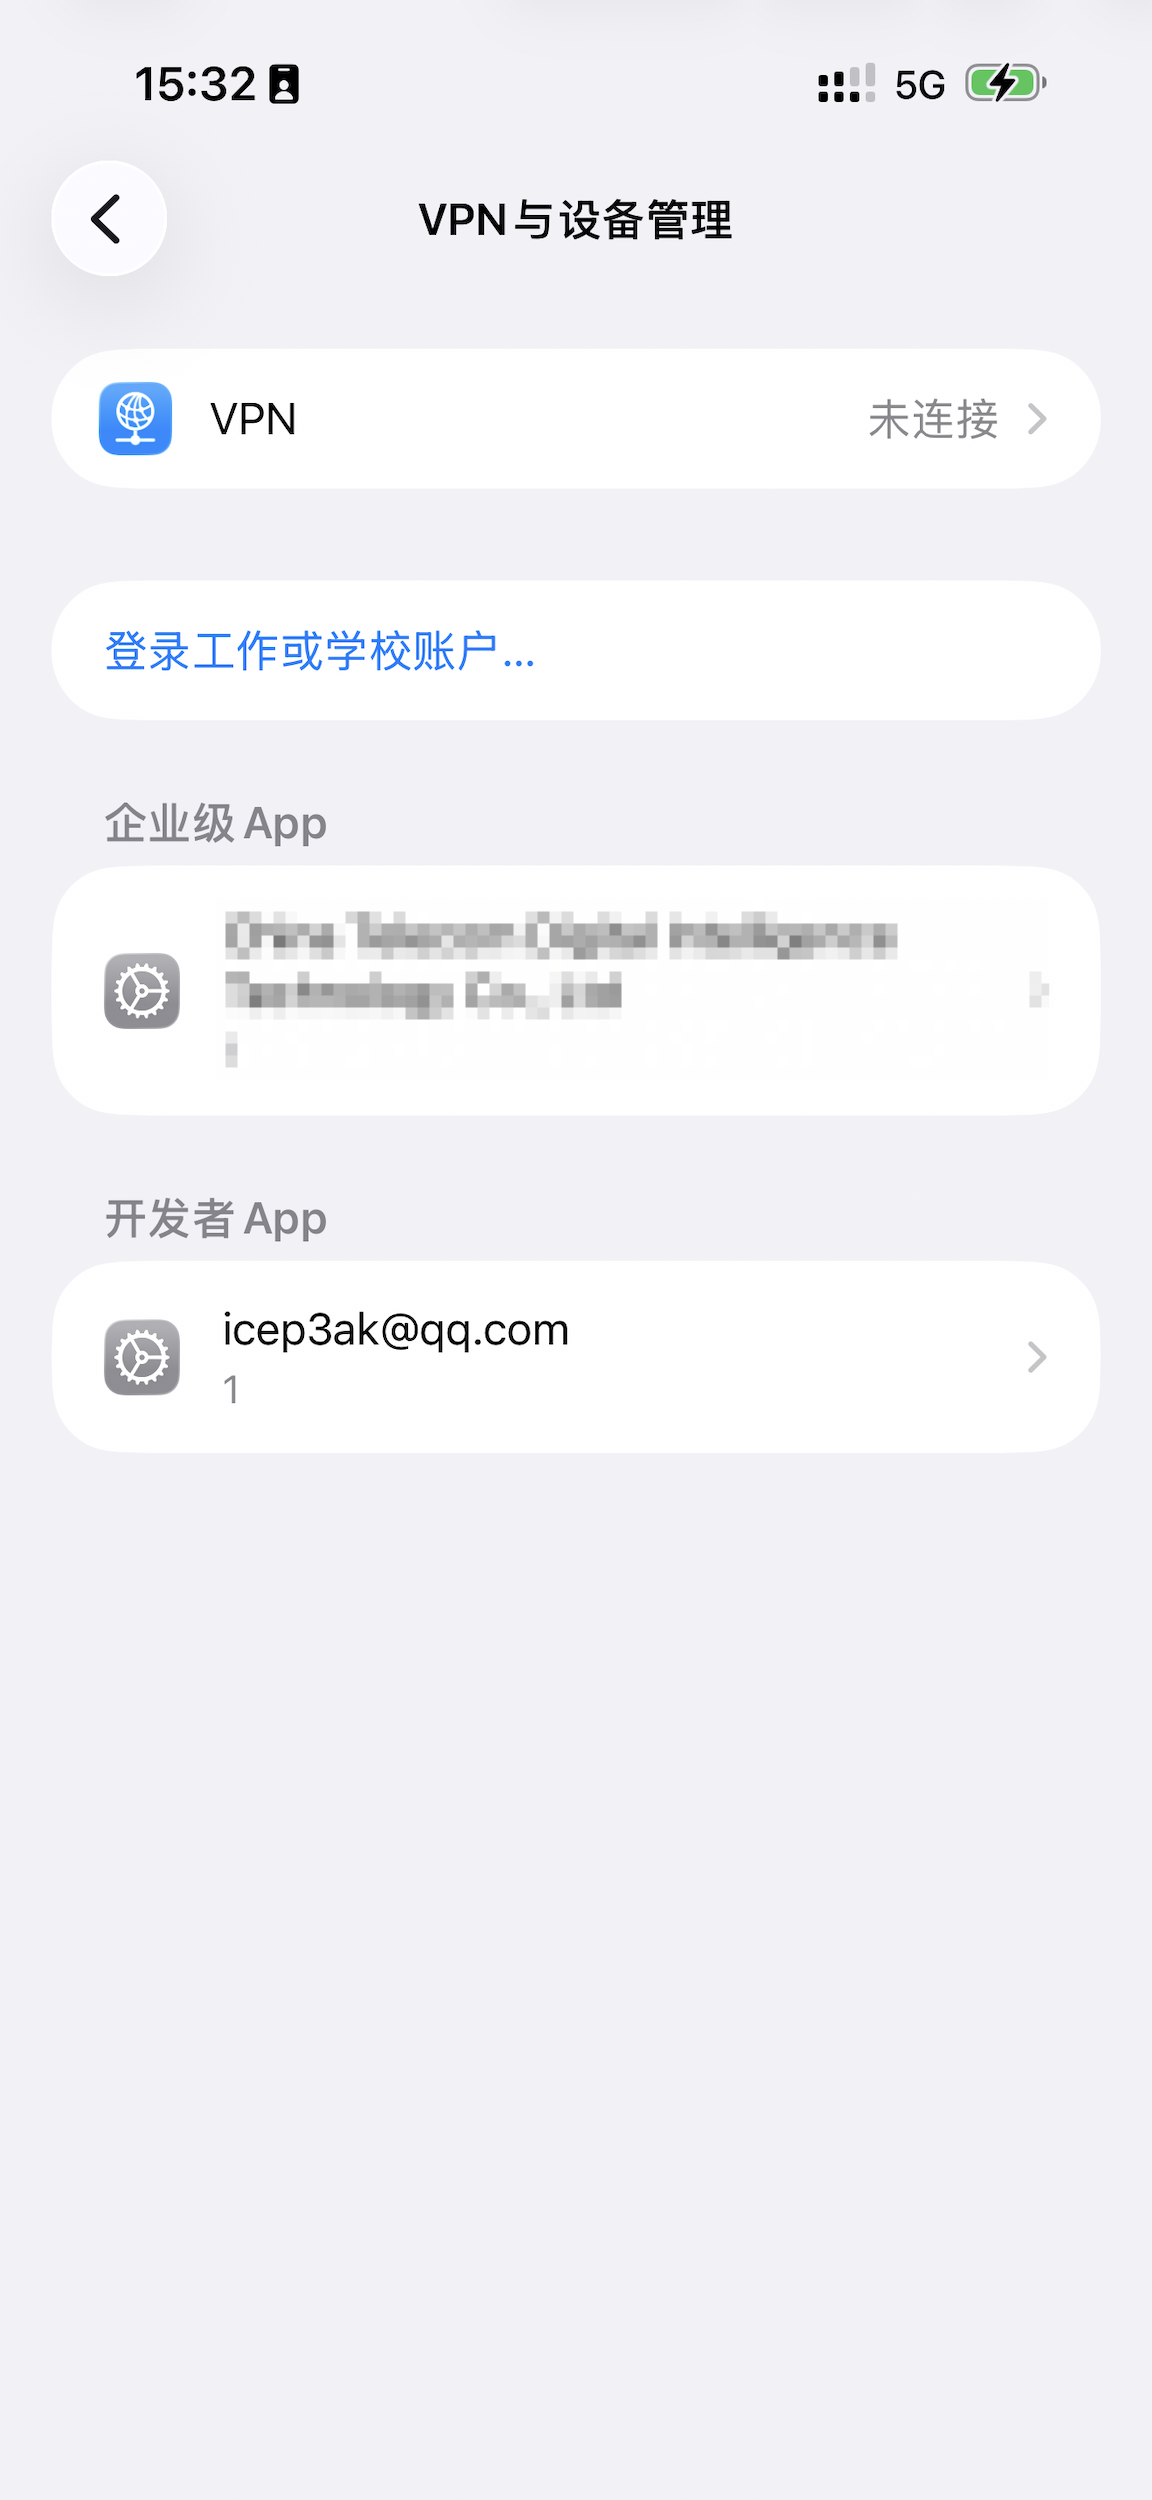
信任开发者(首次运行)
如果设备上出现"不受信任的开发者"警告:
- 在 iOS 设备上打开 设置 → 通用 → VPN与设备管理
- 找到你的开发者账号
- 点击信任
验证 WDA 启动
点击View -> Debug Area -> Activate Consoe,然后在 Xcode Console 中查找以下日志:
|
|
记下这个 IP 地址(等会 USB 转发要用)。
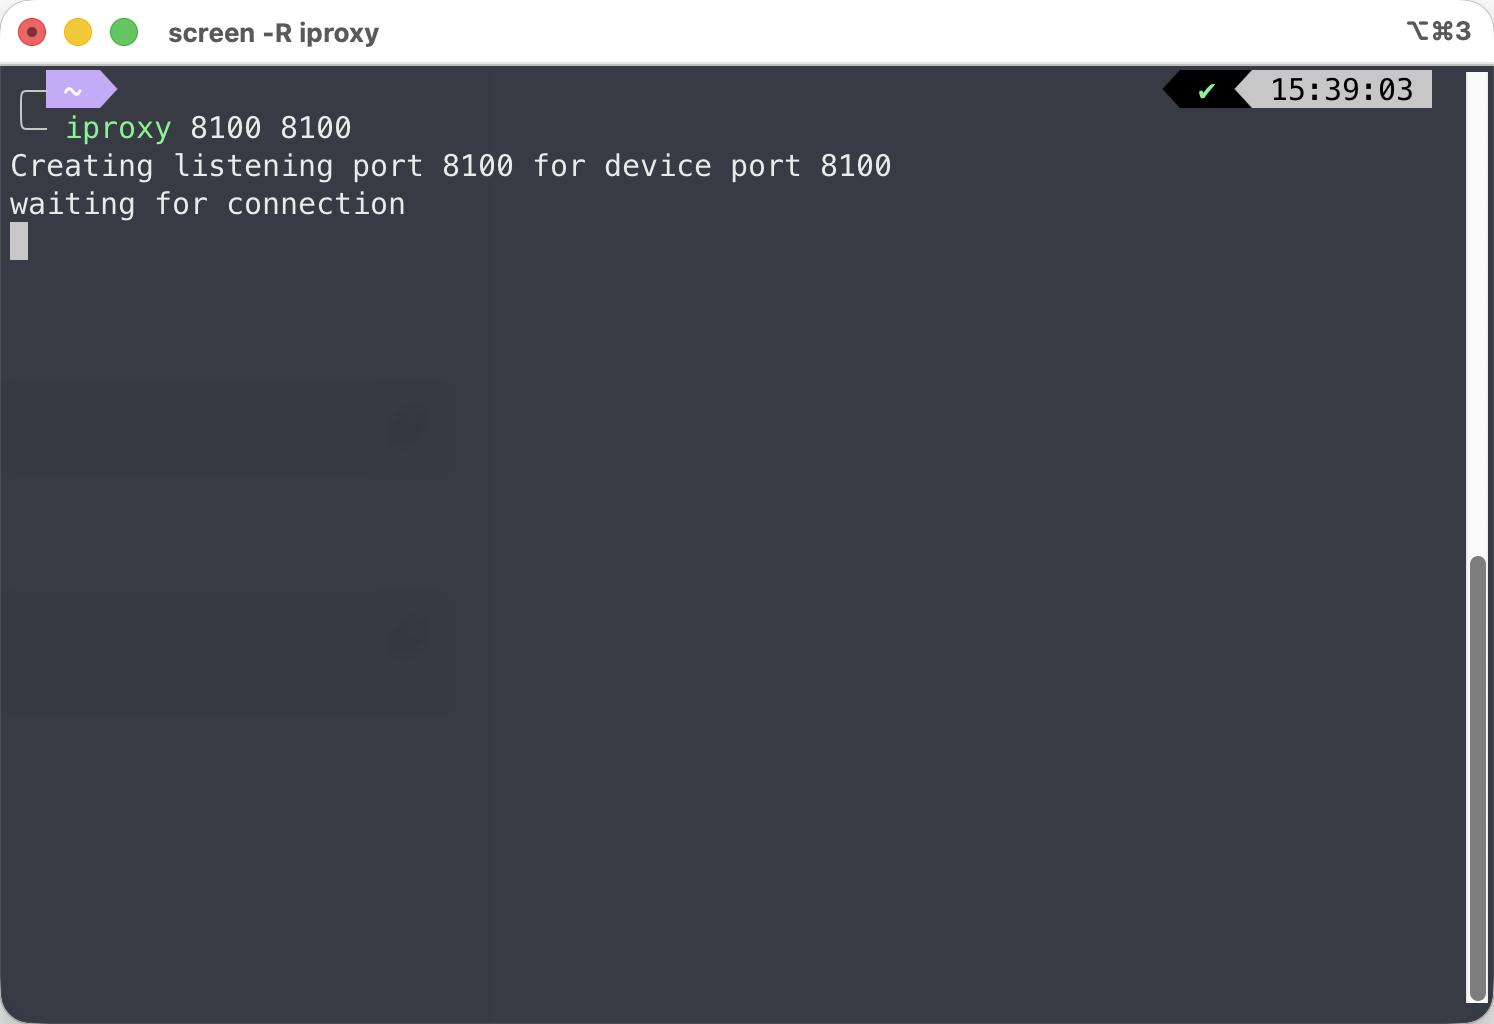
USB 端口转发
为什么需要 iproxy?
核心问题: iOS 的安全限制使得 WiFi 直连 WDA 不稳定且经常被阻断。 解决方案: 使用 USB 端口转发,将 Mac 的本地端口映射到 iPhone 的端口。
启动 iproxy
在单独的终端窗口运行(需要保持运行):
|
|
输出示例:
|
|
关键点:
- ✅ 此命令需要持续运行,不要关闭终端
- ✅ 如果看到 “waiting for connection”,说明正常
- ✅ 建议在 tmux/screen 中运行,或使用后台进程
验证连接
在另一个终端运行:
|
|
成功输出(JSON格式):
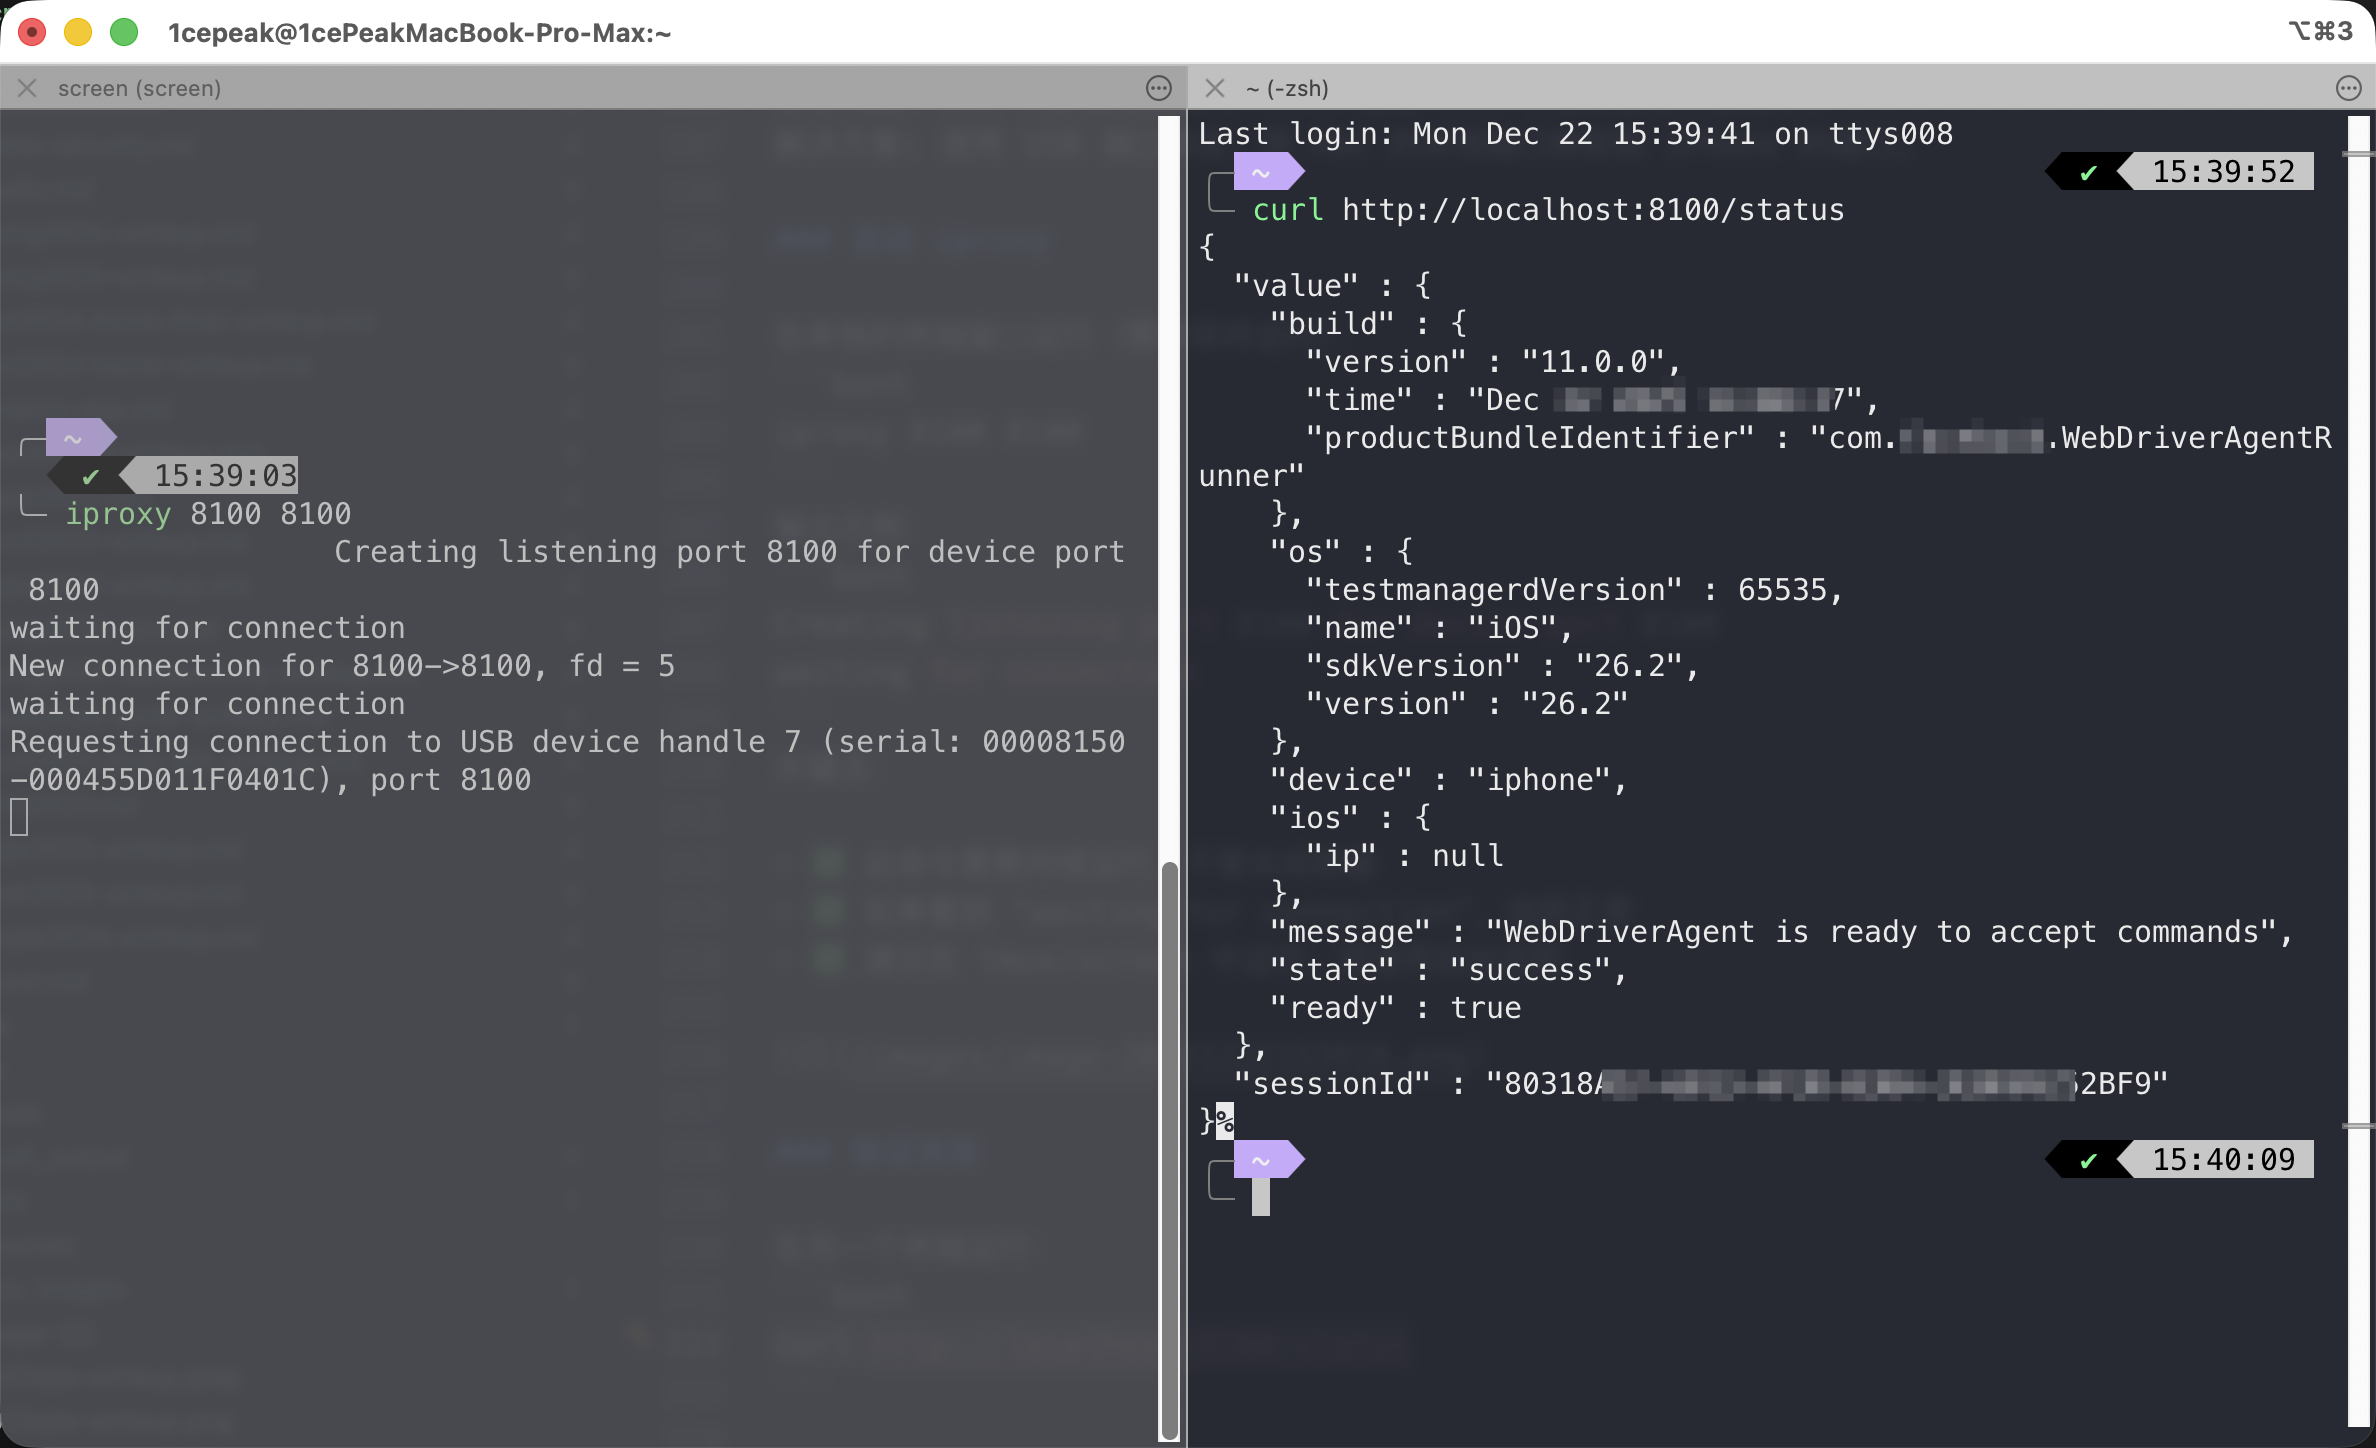
失败情况:
|
|
解决方法:
- 确认 iproxy 正在运行
- 确认 WDA 在 Xcode 中正在运行(Test 状态)
- 检查设备是否通过 USB 连接
安装 Open-AutoGLM
刚才已经下载好Open-AutoGLM项目了,接下来创建虚拟环境。
创建虚拟环境
|
|
安装依赖
|
|
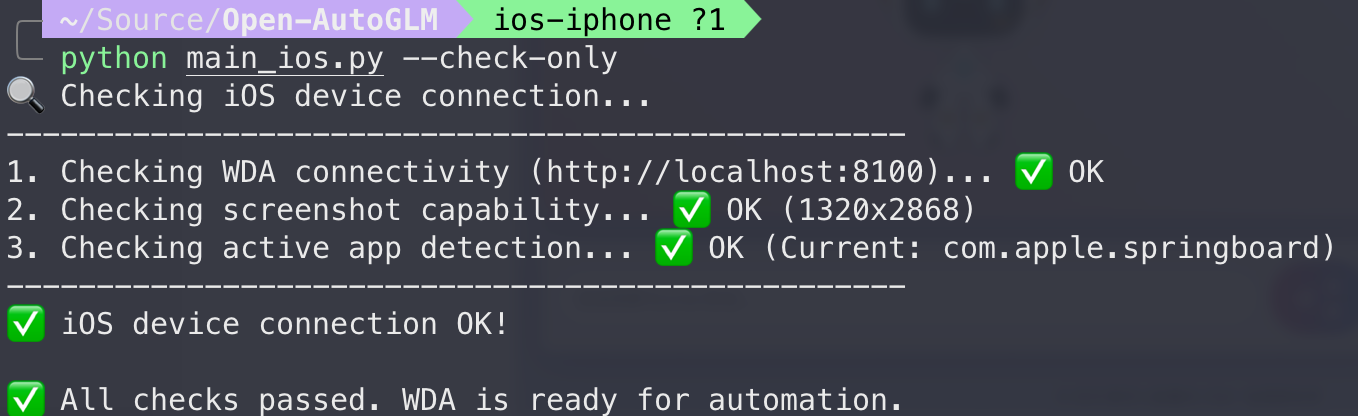
验证安装
|
|
AI运行测试
获取 API Key
如果使用在线大模型的话,前往智谱官网注册新用户并创建API Key:https://open.bigmodel.cn
运行基础任务
|
|
查看支持的 App
|
|
交互模式
|
|
然后输入任务,例如:
- “打开微信发送今天北京的天气预报给文件传输助手”
- “打开淘宝搜索 iPhone 17 Pro Max”
- “打开滴滴出行,我要去故宫”
弹窗处理
弹窗识别能力
AutoGLM-Phone-9B 是视觉-语言模型,可以识别和处理弹窗:
✅ 可以识别:
- 广告弹窗
- 权限请求(定位、通知、相机等)
- 更新提示
- 活动推广
- 引导页
✅ 可以执行:
- 点击"关闭"、“X"按钮
- 点击"取消”、“稍后再说”
- 点击"跳过"、“我知道了”
- 点击弹窗外区域关闭
目前还是局限于手机连接到电脑的情况,后期要是能够集成到Siri里面就更完美了,再次感谢智谱和Rockefeller开源的项目。