一文带你了解Arnold猫脸变换
Arnold猫脸变换
概述
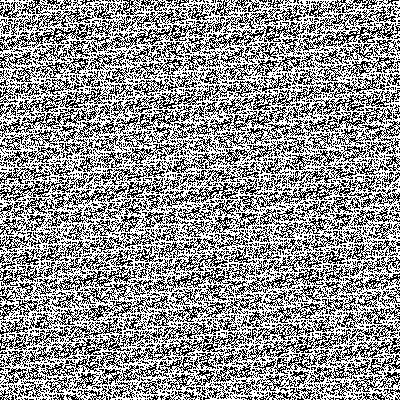
利用Arnold变换(又称猫脸变换)可以对图像进行置乱,使得原本有意义的图像变成一张无意义的图像。该变换可以在其它图像处理前对图像做预处理,例如在数字盲水印嵌入前对水印进行置乱。也可以用于普通的图像加密。
通常一次Arnold变换达不到理想效果,需要对图像进行连续多次的变换。Arnold变换具有周期性,即对图像连续进行Arnold变换,最终又能得到原图像。变换的周期和图像的尺寸有关。
当图像是一张方形的图像时,Arnold变换存在逆变换。经过N次Arnold变换后的数据可以通过N次逆变换恢复数据。
Arnold变换不仅可以用于图像置乱,也可以用于其它数据的置乱和加密。

Arnold置换原理
所谓的打乱次序指的是对图像进行“坐标变换”,只不过这种变换不是随意的变换,变换需要具有两个硬性要求:
(1)变换就是加密,那么必须存在对应的逆变换(解密)
(2)变换能保证图像的像素被彻底打乱,观察者看不出加密后图像包含的信息
为此,Arnold发明了下面的变换方式:
广义猫脸变换矩阵公式

其中x和y表示坐标,new表示变换以后的坐标,ori表示原始的坐标(original缩写),a和b是两个可选的参数,mod为求余数操作,N是图像的长或者宽,这里只考虑长度和宽度相等的图像,上式表示的就是“图像的坐标变换”。
广义猫脸变换行列式公式

其逆变换公式为:
广义猫脸逆变换矩阵公式

广义猫脸逆变换多项式公式

代码实现
有几个参数是必须考虑的,比如:
- 打乱的次数
- a和b的取值
# -*- coding: UTF-8 -*-

import matplotlib.pyplot as plt
import cv2
import numpy as np
from PIL import Image

img = cv2.imread('flag.png')

def arnold_encode(image, shuffle_times, a, b):
    """ Arnold shuffle for rgb image
    Args:
        image: input original rgb image
        shuffle_times: how many times to shuffle
    Returns:
        Arnold encode image
    """
    # 1:创建新图像
    arnold_image = np.zeros(shape=image.shape)

    # 2:计算N
    h, w = image.shape[0], image.shape[1]
    N = h   # 或N=w

    # 3:遍历像素坐标变换
    for time in range(shuffle_times):
        for ori_x in range(h):
            for ori_y in range(w):
                # 按照公式坐标变换
                new_x = (1*ori_x + b*ori_y)% N
                new_y = (a*ori_x + (a*b+1)*ori_y) % N

                # 像素赋值
                print(image[ori_x, ori_y, :])
                print(arnold_image[new_x, new_y, :])
                arnold_image[new_x, new_y, :] = image[ori_x, ori_y, :]

    cv2.imwrite('flag_arnold_encode.png', arnold_image, [int(cv2.IMWRITE_PNG_COMPRESSION), 0])
    return arnold_image

def arnold_decode(image, shuffle_times, a, b):
    """ decode for rgb image that encoded by Arnold
    Args:
        image: rgb image encoded by Arnold
        shuffle_times: how many times to shuffle
    Returns:
        decode image
    """
    # 1:创建新图像
    decode_image = np.zeros(shape=image.shape)
    # 2:计算N
    h, w = image.shape[0], image.shape[1]
    N = h  # 或N=w

    # 3:遍历像素坐标变换
    for time in range(shuffle_times):
        for ori_x in range(h):
            for ori_y in range(w):
                # 按照公式坐标变换
                new_x = ((a * b + 1) * ori_x + (-b) * ori_y) % N
                new_y = ((-a) * ori_x + ori_y) % N
                decode_image[new_x, new_y, :] = image[ori_x, ori_y, :]

    cv2.imwrite('flag.png', decode_image, [int(cv2.IMWRITE_PNG_COMPRESSION), 0])
    return decode_image

# arnold_encode(img, 1, 2, 3)
arnold_decode(img, 1, 29294, 7302244)
例题实现

上述代码跑完之后的结果如下:

可以看出,成功恢复出了图片的像素。
彩蛋一
在本文恰好发布8个月后(2023年10月27日-2024年6月27日,就很神奇),B站知名网络安全UP主(SageMath)也就是@LOV3师傅发现了预置的彩蛋。如果你认真分析了上面Arnold的代码,会发现shuffle_times这个参数其实是没有生效的,无论shuffle_times是多少,图片都没有变化。可能国内很多Arnold题目的出题人也没有注意到这一点,直接照抄了现成的代码。不过也挺好的,参赛选手的解题时间也会大大缩短。
修正过的代码如下:
def arnold_encode(image, shuffle_times, a, b):
    """ Arnold shuffle for rgb image
    Args:
        image: input original rgb image
        shuffle_times: how many times to shuffle
    Returns:
        Arnold encode image
    """
    # 1:创建新图像
    arnold_image = np.zeros(shape=image.shape)

    # 2:计算N
    h, w = image.shape[0], image.shape[1]
    N = h   # 或N=w

    # 3:遍历像素坐标变换
    for time in range(shuffle_times):
        for ori_x in range(h):
            for ori_y in range(w):
                # 按照公式坐标变换
                new_x = (1*ori_x + b*ori_y)% N
                new_y = (a*ori_x + (a*b+1)*ori_y) % N

                # 像素赋值
                # print(image[ori_x, ori_y, :])
                # print(arnold_image[new_x, new_y, :])
                arnold_image[new_x, new_y, :] = image[ori_x, ori_y, :]

        # 更新坐标
        image = np.copy(arnold_image)

    cv2.imwrite('flag_arnold_encode.png', arnold_image, [int(cv2.IMWRITE_PNG_COMPRESSION), 0])
    return arnold_image
彩蛋二
如果shuffle_times很大的情况下,如何优化代码呢?
参考文献
https://www.jianshu.com/p/39727dbaffd9
https://zhuanlan.zhihu.com/p/90483213